Take the guided tour
The guided tour walks clinicians through the primary workspace zones, highlighting case entry, clinical tools, consult history, and intake messaging.
What it does
The guided tour uses spotlight callouts to introduce key areas of the Diagnify interface step by step. It explains where to record presenting complaints, how to open right-hand clinical tools, how to review encounter history, and how to dispatch digital intake links.
When to use it
Take the guided tour during your first login, after major interface updates, or whenever you need a quick visual refresher of workspace navigation.
Step by step
- Select Help on the left rail to highlight the central case description area.
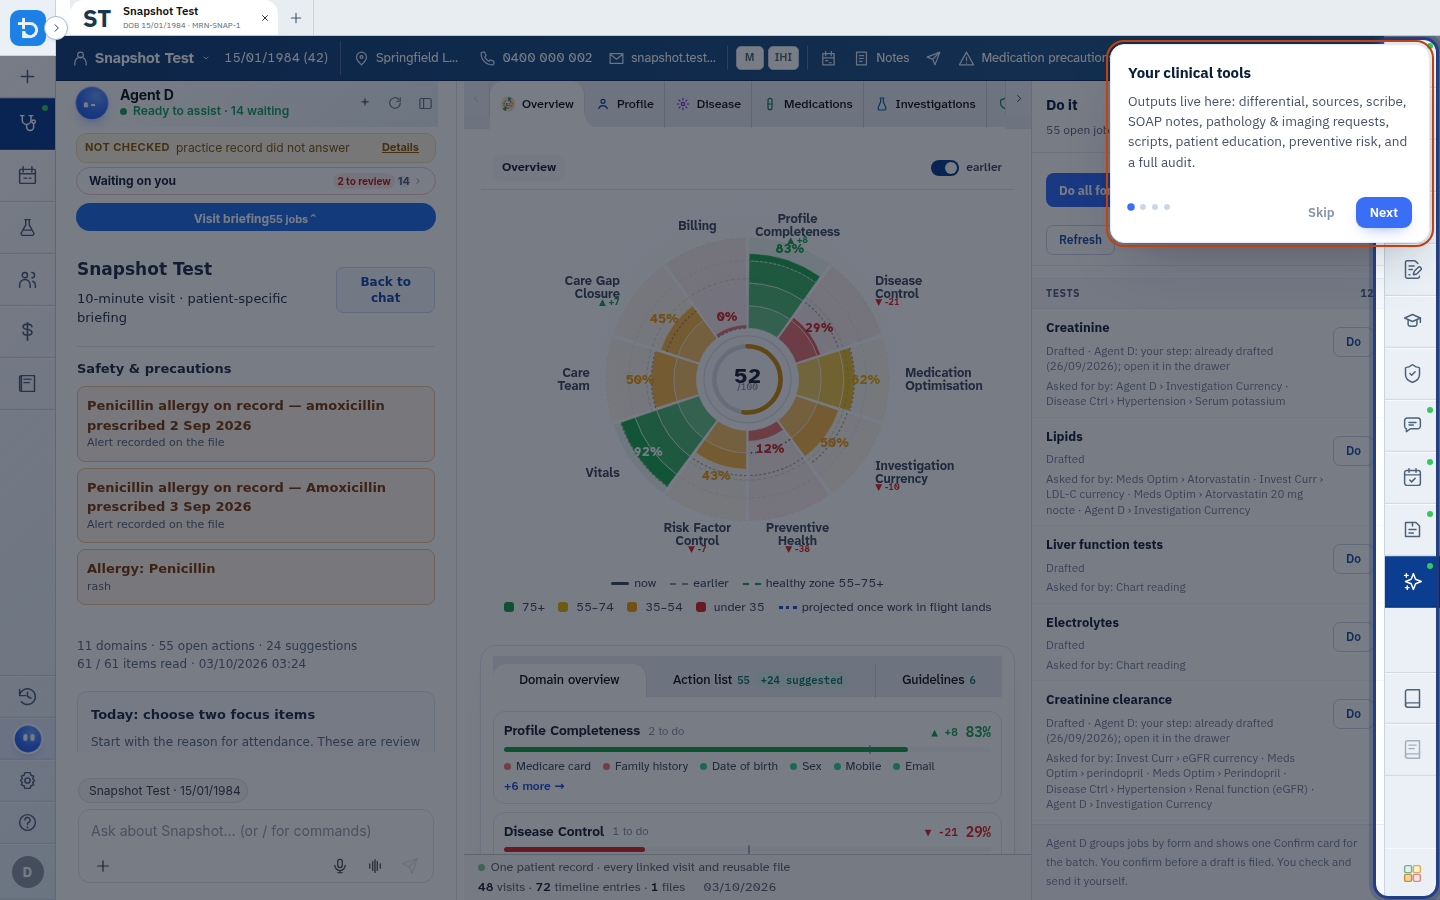
- Follow the highlight to the right toolbar to inspect clinical tools including scripts, labs, and letters.
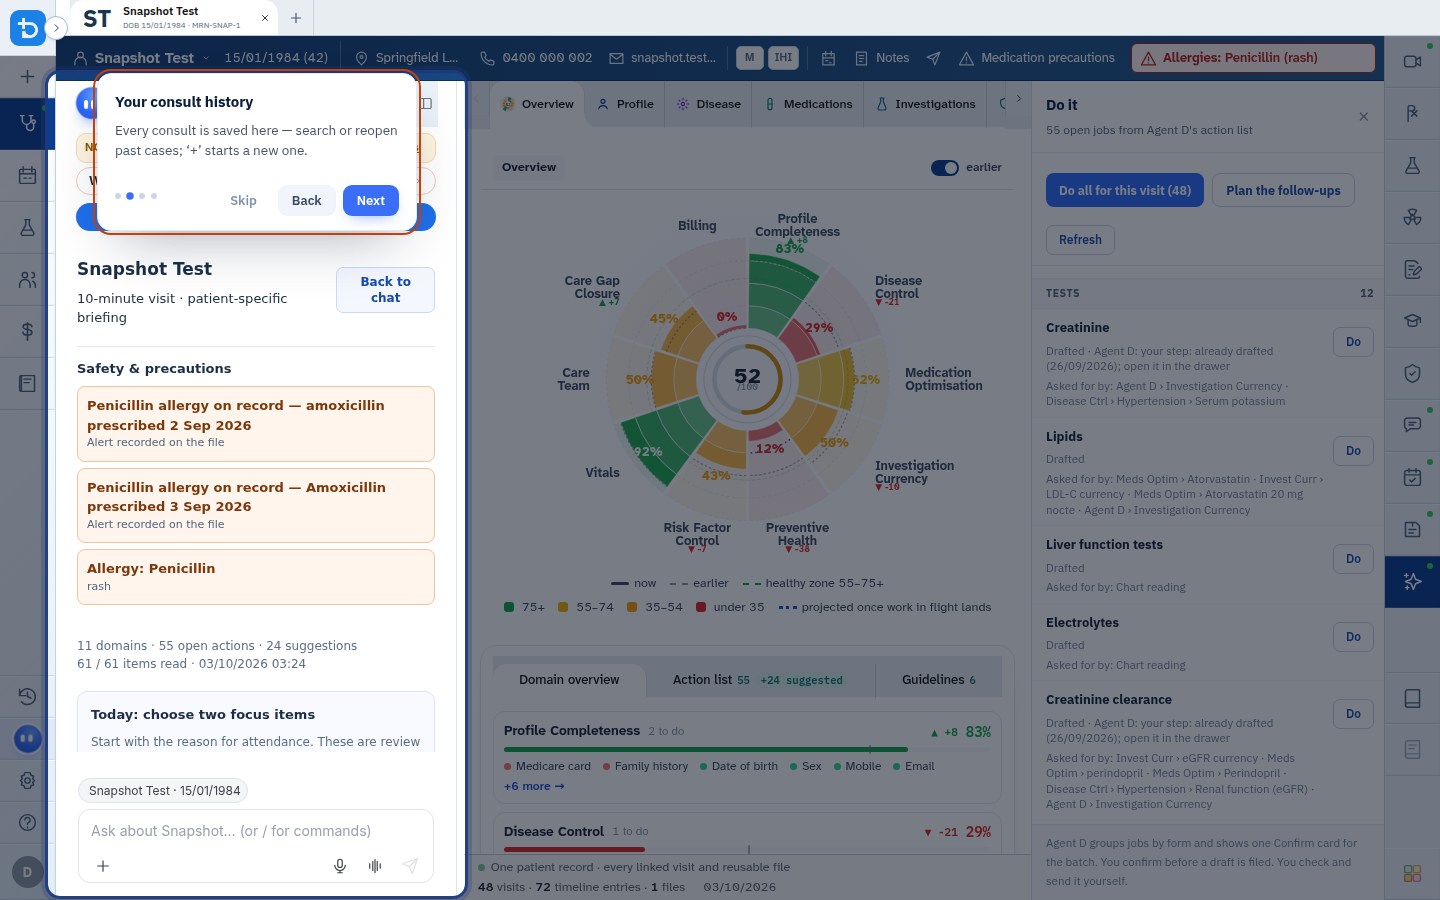
- Review the patient encounter history step pointing to past consultation records.
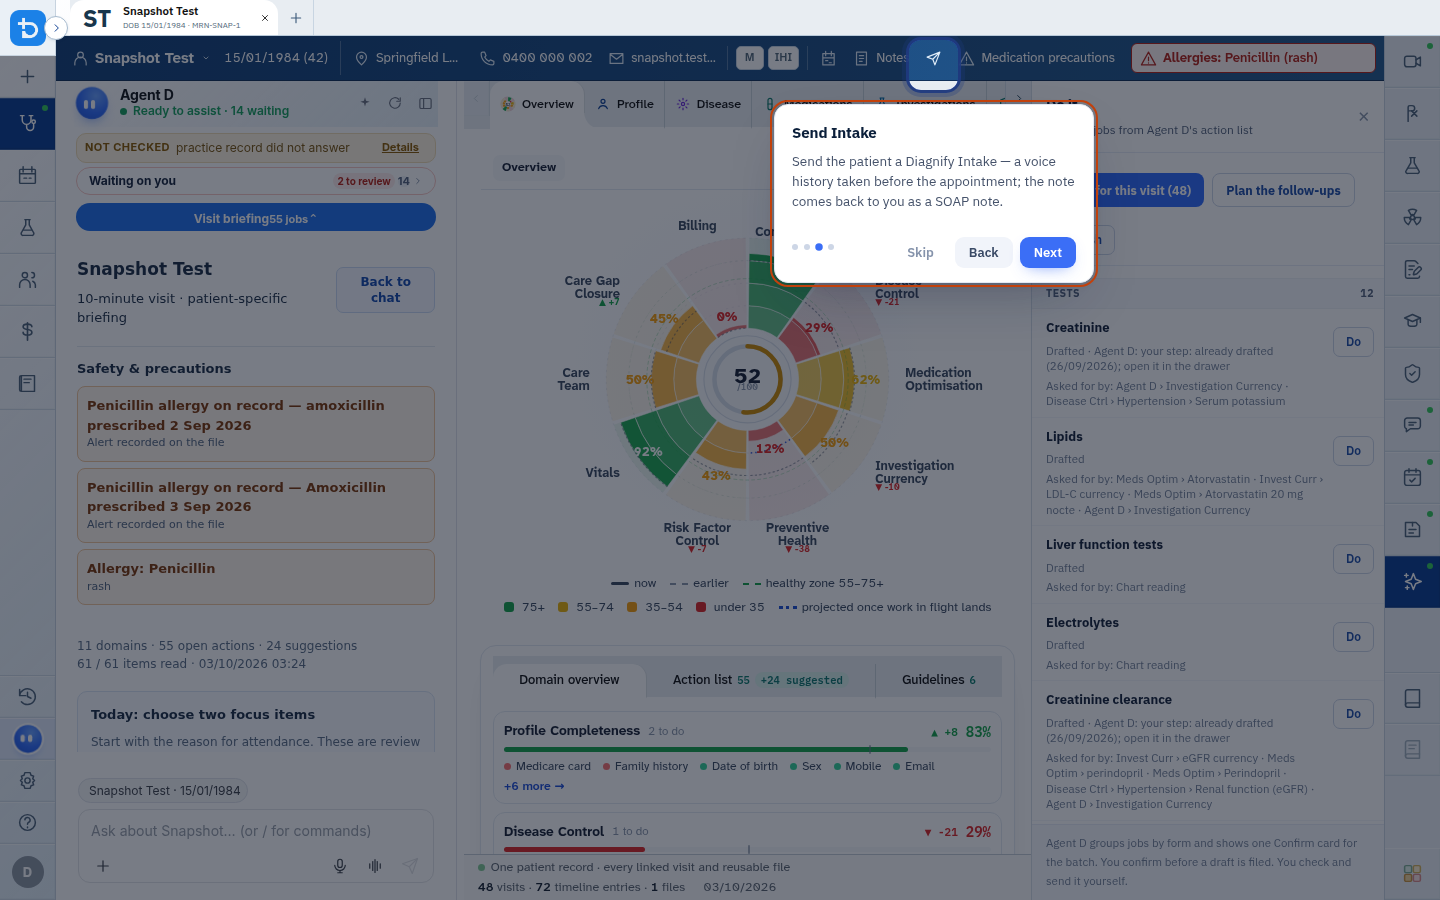
- View the Send Intake callout demonstrating patient intake links, then select Done to exit.
Also on this screen
- Describe the case: The initial tour spotlight highlighting where you enter patient symptoms and history.
- Your clinical tools: The second spotlight directing attention to the right tool drawer for prescriptions, requests, and referrals.
- Your consult history: The third spotlight pointing to the chronological timeline of previous consultations.
- Send Intake: The fourth spotlight pointing to digital patient intake messaging.
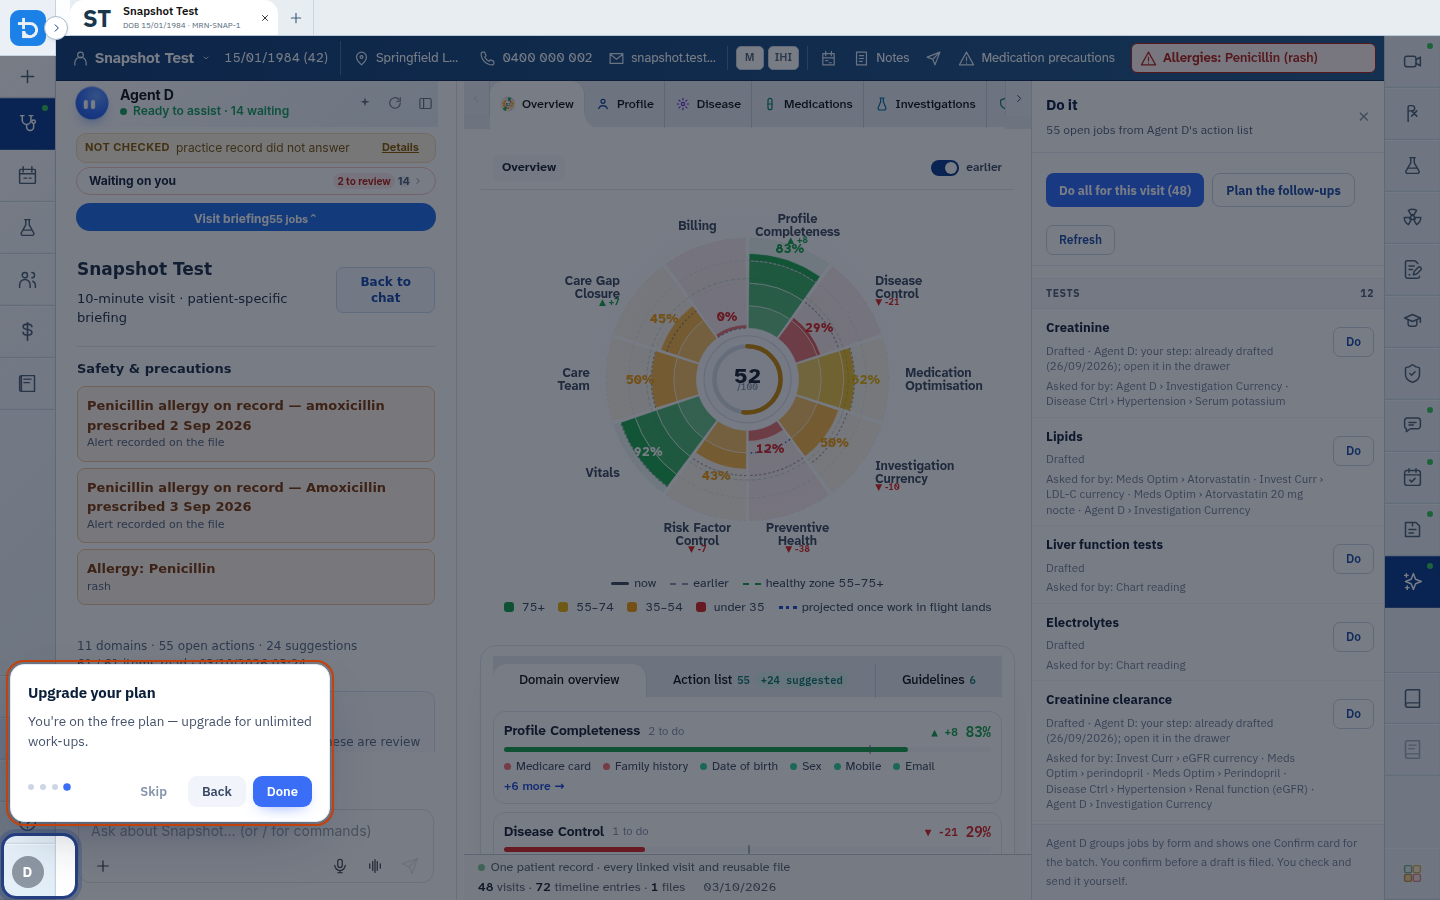
- Step dots: Visual indicators at the base of the callout showing your progress through the four tour steps.
- Next and Done: Advances to the next tour step; changes to Done on the final step to conclude the walkthrough.
- Back: Returns to the preceding tour step (disabled on step 1).
- Skip: Closes the tour immediately from any step.
- Keyboard navigation: Press Right Arrow or Enter to proceed, Left Arrow to go back, or Esc to exit.
- Reopen this tour anytime: Re-running the tour is available at any time by selecting the Help button.
What Agent D can do
- Agent D works alongside the tour, demonstrating where suggested plans and clinical insights appear.
- Agent D does not perform autonomous actions while the tour is running.
Safety (what needs your Confirm)
- The guided tour is an educational walkthrough that does not generate real clinical documents or dispatch SMS messages.
- The Send Intake step highlights the intake button for instructional purposes only; no patient communication is triggered.
Common questions
How do I exit the guided tour if I am in a hurry?
Select Skip in the tour callout or press the Esc key on your keyboard to dismiss the tour instantly.
Can I navigate the tour using keyboard shortcuts?
Yes. Use the Right Arrow or Enter to advance, Left Arrow to go back, and Esc to close.
Does completing the tour mark any clinical tasks as complete?
No. The tour has no impact on patient records, task lists, or billing.
Related
Last reviewed: 03/10/2026.